Painting the Biltmore - My watercolor painting process
I thought it would be fun to show you the evolution of a custom venue watercolor painting and how I go from painting the finished product. Below is a new painting of The Biltmore Estate in Asheville, North Carolina that I completed for one of my client’s invitation suites. We ended up incorporating this painting into their envelope liner along with an extra special little addition that you’ll just have to scroll to the end to see!
If you want more details about commissioning you’re own venue illustration or how we can work together to create your dream wedding invitations click here!

Phase 1
The Sketch!
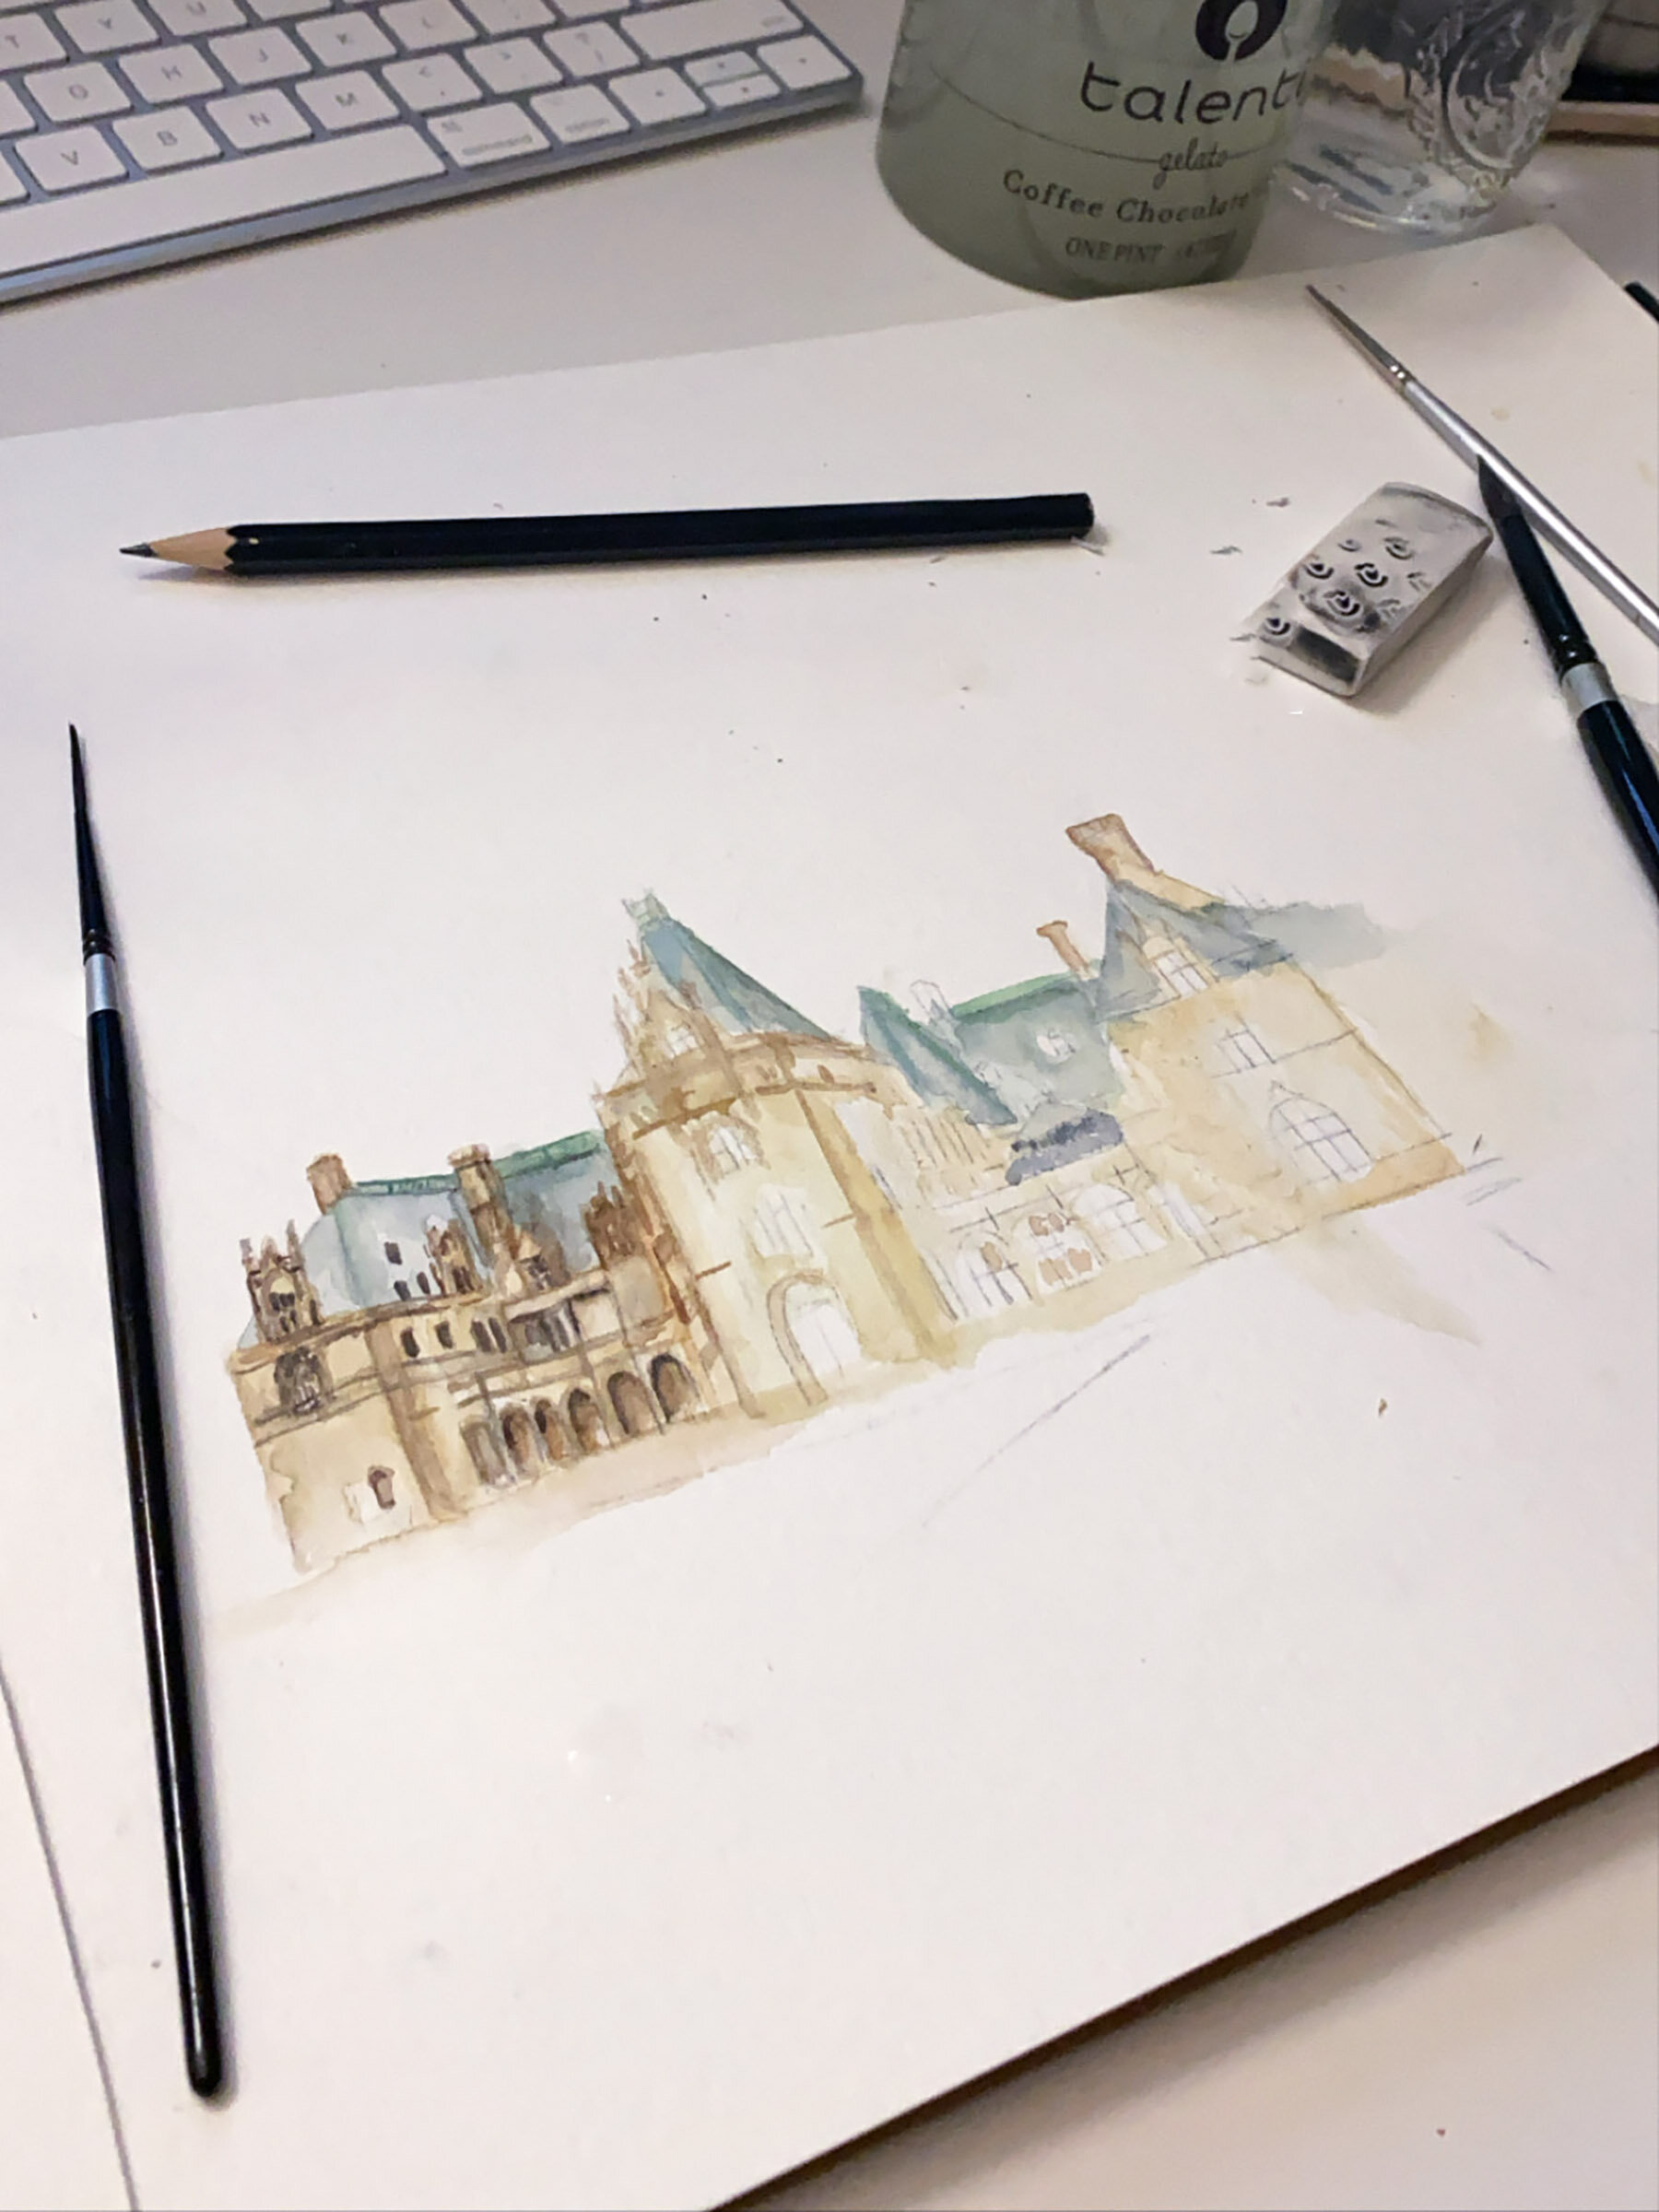
The beginning of any watercolor starts with determining what size I want to paint the venue. Because this painting would be on the inner envelope liner and those are a little on the larger size I decided to work relatively large for this painting. The final size of just the building is approximately 7 inches by 3.5 inches, not including the grassy area and sidewalk in front of the building.
Working slightly bigger than my intended final print size allows me to get just the right amount of details in the artwork and not spend too much time on those really small intricacies that will end up scaling down so small you won’t really be paying attention to them anyway. The building portion ended up scaling down to approximately 5 inches by 2.5 inches. So overall not too much scaling down was involved here.

Once the size is determined I sketch out the full building along with any key features I want to include in the painting.
For the composition of this building I knew I wanted to only show a sliver of the building that will welcome the guests to the ceremony. We also wanted to incorporate a super sweet addition to the walkway, their dog Moses. In order to give him his runway to the Biltmore, I wanted to set the scene of him walking in the foreground up to the chateau. Therefore the building itself would be set off-center to allow him to be in the front focal point and then the building could be in the background.
I wanted the entrance to be another focal point and be the most elaborate and detailed. There are potted plants in front of the building, but I only wanted to hint at these in my painting and not have them take away from the overall building. So I decided to keep these a little smaller than what they actually are since the greens and florals in the plants themselves could take the eye away from the cream colors in the building if I make them too bright and colorful. I also knew I didn’t want the full building in the sketch. I was going to be vignetting the overall appearance of the liner so I needed enough building to work with for this and have some greenery around to fade out to.
Once I’m done sketching, I will actually go in with an eraser and lightly erase all my sketch lines until they’re just visible. Because watercolor is so transparent I want to ensure I don’t leave any dark pencil marks that can’t be fully covered by the paint.
The sketching part can take anywhere from 20 minutes to 45 minutes depending on how detailed the architecture is and how big I end up working.

I post a lot of my progress photos on my Instagram stories, if you don’t follow me yet, here’s a subtle ;) nudge to click here and follow along!
Phase 2
First layers of paint!
Fun fact, this is the third time I’ve painted the Biltmore Estate!
Now for the first layer of paint. I like to evenly wash the building and surrounding features in a singular color. This helps me get that first layer of paint on the paper that can sometimes be super intimidating. With a base color, I can begin to work in small amounts of value changes and shadows that help to define the key features of the building.
This is where I always tell people the painting will look kind of bad before it looks beautiful. Seriously, I actually really don’t like sharing this stage of the painting because it can look so blah.
With my blobs of color laid out I now wait for everything to dry before I head back in and start applying details. I want my paper and underpainting to be relatively dry so that my next layers of colors don’t bleed into the surrounding features due to the wet paper. Most of the time I love this bleeding effect, but not when I’m painting architecture, I prefer to work with a little bit more control when painting buildings.
You’ll notice my paintings are not super detailed. My overall aesthetic and style is somewhat loose and expressive rather than super life-like and exact. I love leaving little marks of brush strokes and varying line widths that add my own splash of character and personality to what I’m painting. I prefer to paint the feeling of the building rather than everything the building is showing me. Straight lines just don’t exist here. And I never exactly measure anything I prefer to rely on eyeballing and letting the movement of the brush strokes to create the final placement of details. If it's not exactly where that window would be, I don’t fret about it, this is my art and I don’t paint photo-realistically.

One more layer of detail and the piece is ready to be dried completely. You’ll notice in the image above I also added some salt to the grass while it was wet to add some texture when it dried. Salt absorbs some of the water when drying and leaves a really fun effect when you brush it off. I love creating this effect on grasses and skies.
Overall the full painting was done over the course of two nights. Spending about 2 hours each time. For a total of 4.5 hours.

Phase 3
Getting everything scanned and cleaned up
Between the painting stage and the printing stage, a few hours of photoshopping magic occur. This is where I scan the artwork and clean it up to make it print-ready. I’ll add any adjustment layers and color corrections necessary as well so that the printed replication looks just as good as the original and fits within our chosen color palette. This step is not as easy as scan and hit print. The color of the paper you’re printing on, the inks in the printer you’re using even the way the final printed piece appears next to all the other details is taken into account to create the best replication possible.
There are also a few hours of designing that happen to create a layout that matches the aesthetic of the rest of the suite. During this phase, I bring in any other pieces that will bring the design to life, in this case, it was the ribbon border and extra floral bouquets that would wrap around the outline of the liner, and of course adding in little Moses’s portrait.
The final result is an envelope liner that beautifully fits within the invitation suite. Guests can open the inner envelope and be welcomed by the stunning Biltmore Estate. Upon taking out the invitation inside they’ll be treated to the cutest little furry man trotting his way up the walkway. A surprise that is sure to delight once they see him gracing the RSVP card.

And that folks is the evolution of a custom venue watercolor illustration!
Want to commission your own venue or home painting?
Did you know I offer these as special commission pieces as well? That’s right you don’t have to have a full invitation suite in order to create a gorgeous portrait of your venue! You can commission either a single building portrait, this is perfect for guest books or framing as a special gift, or you can add on a personal rights release which will allow you to use the digital illustration file on something you already have planned for your wedding such as you’re own DIY invitations, pillows, dance floor design, etc. Interested in learning more? That button below will take you where you need to go!